《AI + IoT Power Couple – Hands-on Custom AI at the Intelligent Edge》 微軟2019年亞太技術年會實作坊 講師:Ted Way、Darwin Schweitzer
課程目標:學習如何將 ML 模型佈署到 IoT 邊緣裝置,用以節省雲端傳輸與運算的消耗,並提升邊緣裝置的反應效率
點我連到 Tutorial 文件
流程
- 從過去取得的設備資料進行機器學習訓練,得到的ML模型利用 Azure Machine Learning(AML)容器化
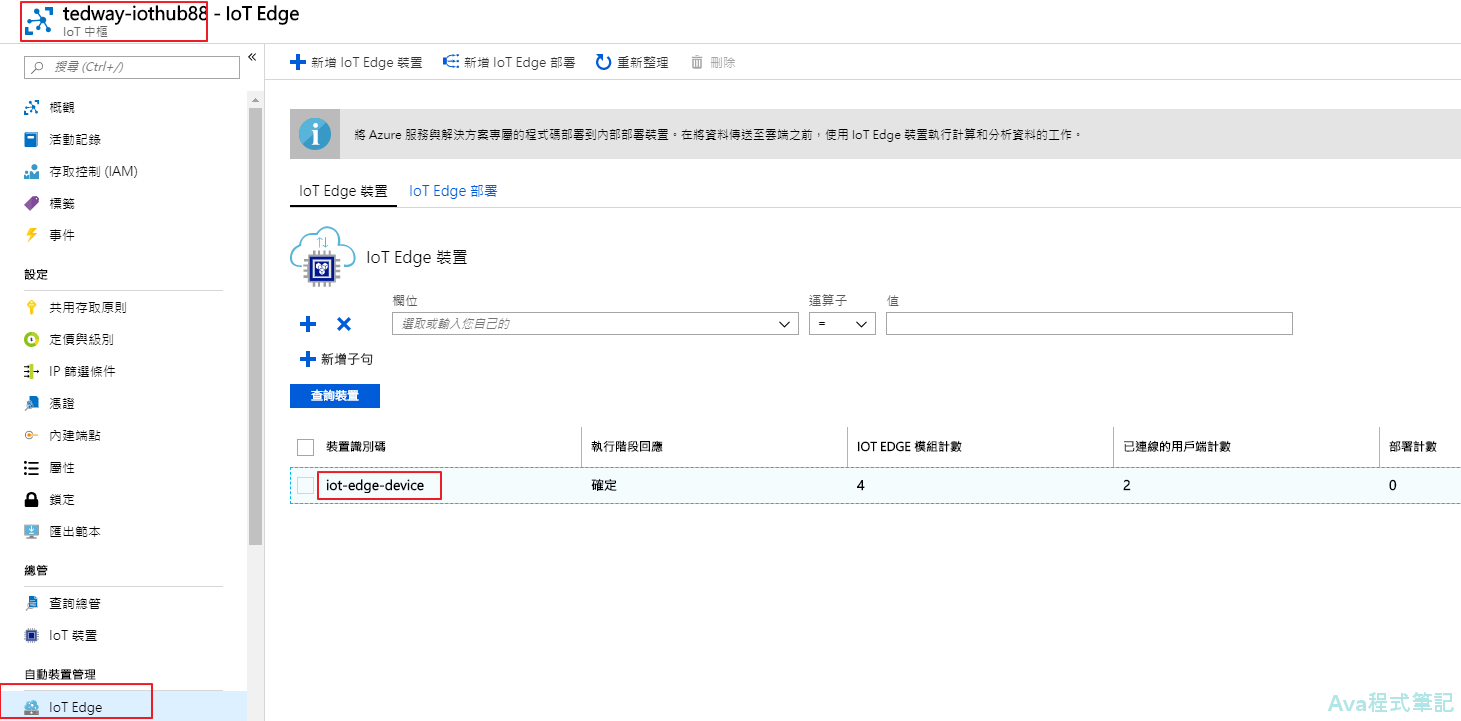
- 建立 Azure IoT Hub,登錄 IoT 邊緣裝置
- 將 AML 模型佈署到 IoT 裝置
系統需求
- 註冊 Azure 帳號
- 安裝 Terminal client 用來連到 IoT 裝置
- 安裝 Visual Studio Code 和 Azure IoT Hub Toolkit
實作步驟
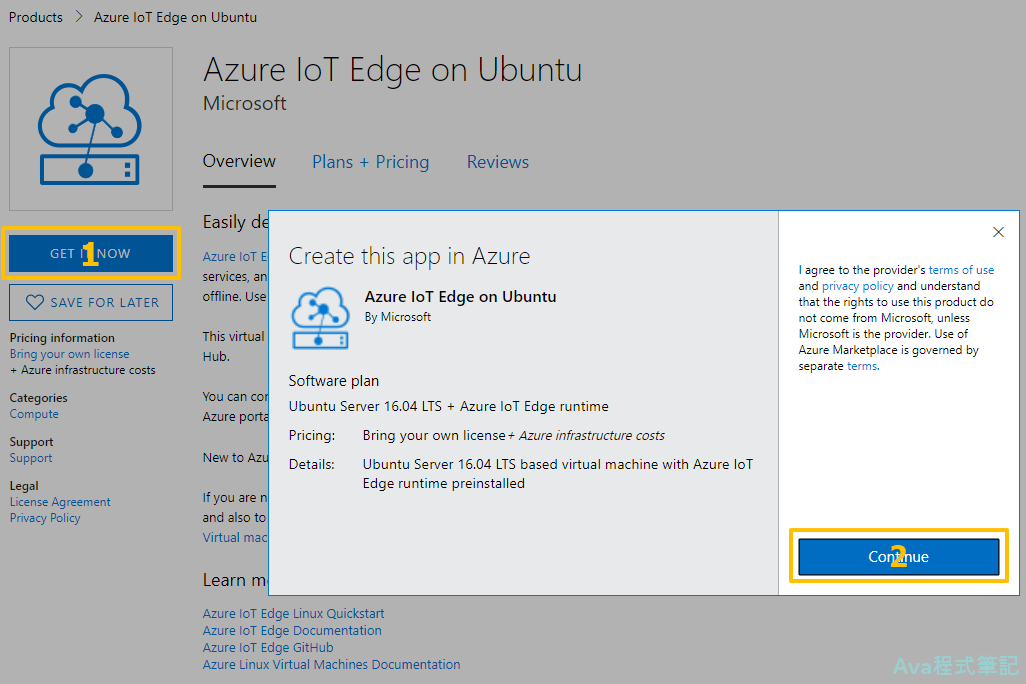
用 Ubuntu VM 來模擬實體的 IoT 裝置,按「Get it now」、「Continue」,就會進到 Azure 中的設定頁面
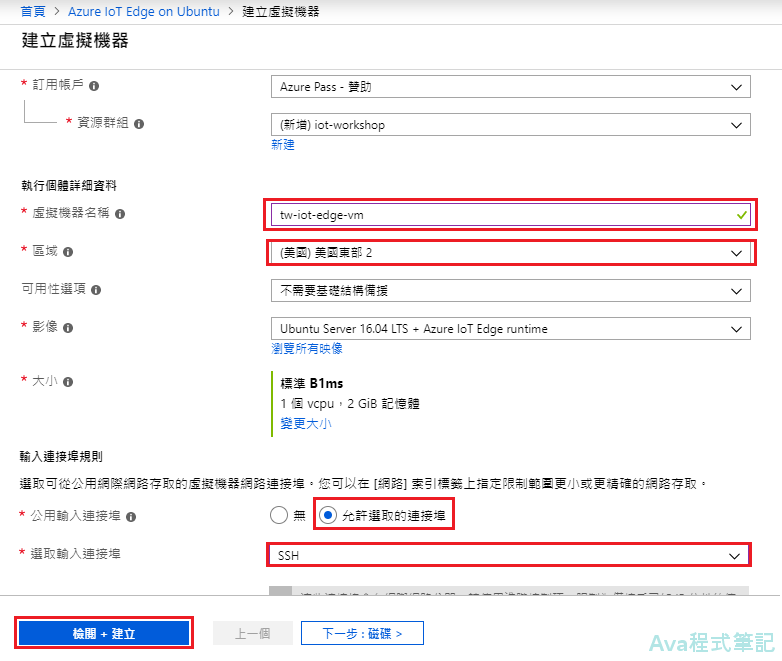
完成 VM 的設定(帳戶的名稱密碼自訂,在 tutorial 中不會用到),下面按「檢閱+建立」,然後繼續按「建立」
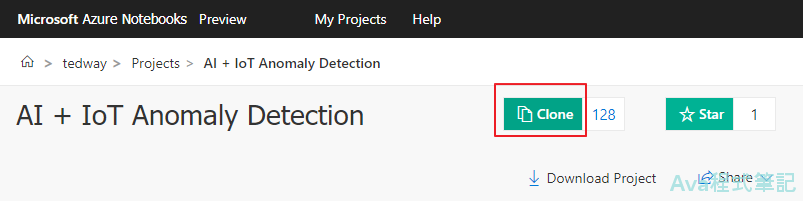
等待 VM 建立時,到 Azure Notebooks,將範例程式碼 clone 到自己的 Notebooks
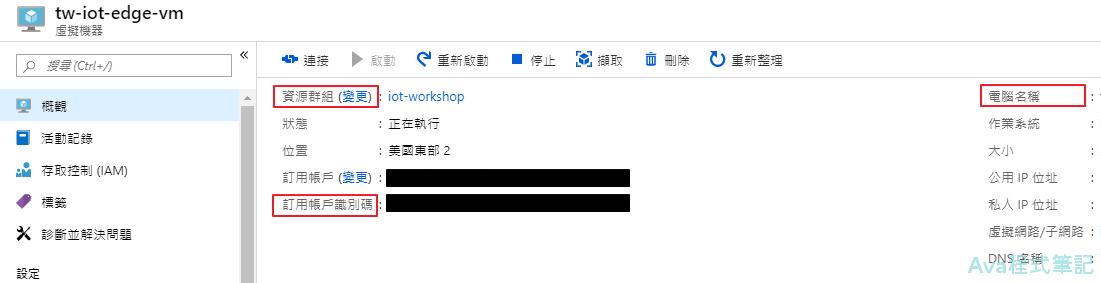
回到 Azure 入口網站,佈署完成後,進到 VM 概觀,等一下會用到下面幾個值
到剛才 clone 完成的 Azure Notebooks ,打開檔案「00-anomaly-detection-tutorial.ipynb」
在第一部分「Specify parameters」將入口網站 VM 的值填入,如下:
# 資源群組名稱
resource_group_name = "iot-workshop"

# 位置
azure_region="eastus2"

# IoT Hub 名稱,可自訂,但具唯一性,需要改成和範例不同的名稱
iot_hub_name="tedway-iothub1"

# IoT Edge 裝置名稱,可自訂
iot_device_id="iot-edge-device"

# 訂用帳戶識別碼
subscription_id = "xxxxxxxx-xxxx-xxxx-xxxx-xxxxxxxx"

# Azure ML workspace 名稱,可自訂
aml_workspace_name = "tedway-aml-iotedge"

# VM 電腦名稱
iot_edge_device_name = "tw-iot-edge-vm"
將第一部分的程式碼跑完,中間會需要輸入 Notebook 顯示的驗證碼並登入 Azure 帳戶進行驗證
!az login
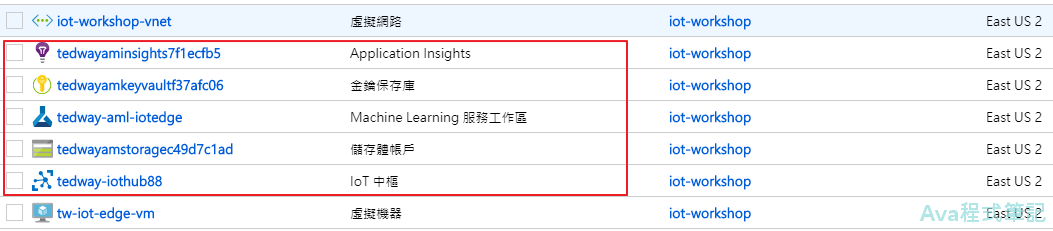
第二部分 Provision Azure ML Workspace and IoT Hub,在 Azure 中建立 ML 服務工作區和 IoT Hub,完成後, Azure 有五個新增的項目
第三部分 Load resources,跑到 3.2 完成後,會出現連線字串,用來修改 3.4 的字串(取代 HostName=….=)
# 3.2 Get the connection string that you will need to enter in the IoT Edge device
!az iot hub device-identity show-connection-string --device-id $iot_device_id --hub-name $iot_hub_name

# 3.4
!az vm run-command invoke -g $resource_group_name -n $iot_edge_device_name --command-id RunShellScript --script "/etc/iotedge/configedge.sh 'HostName=...='"
之後 Anomaly Detection Model 中,在 Train the model 部分進行 ML 模型的訓練,專案裡已經有範例溫度資料可以用,訓練好後會將模型存到磁碟中,然後在重新載入 Notebook 測試,來確定模型沒有錯
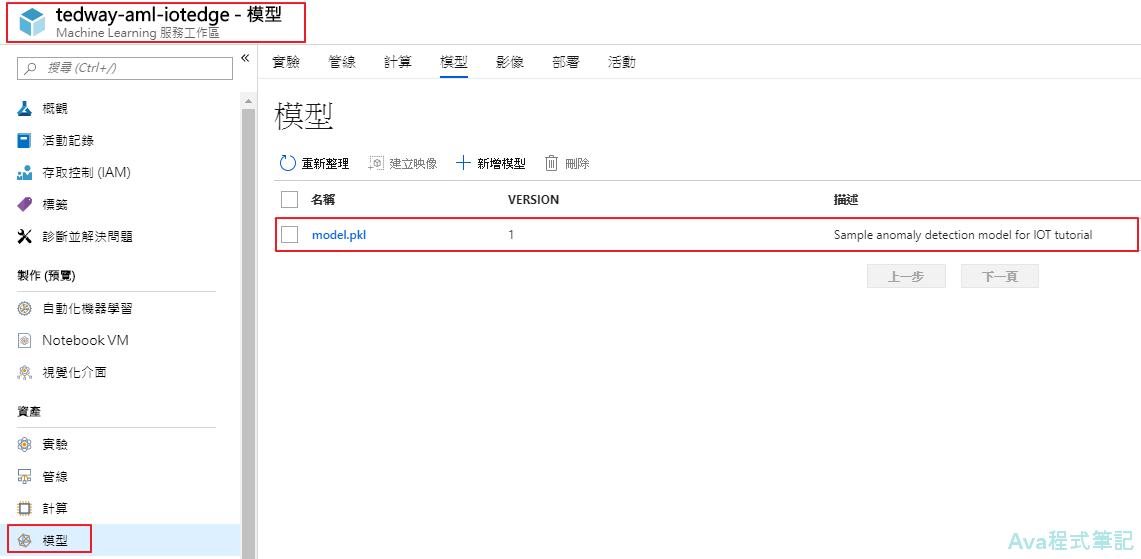
Register Model 部分,模型會在 Azure 的 ML 服務工作區進行註冊,完成後,可以看到服務工作區有建立的模型
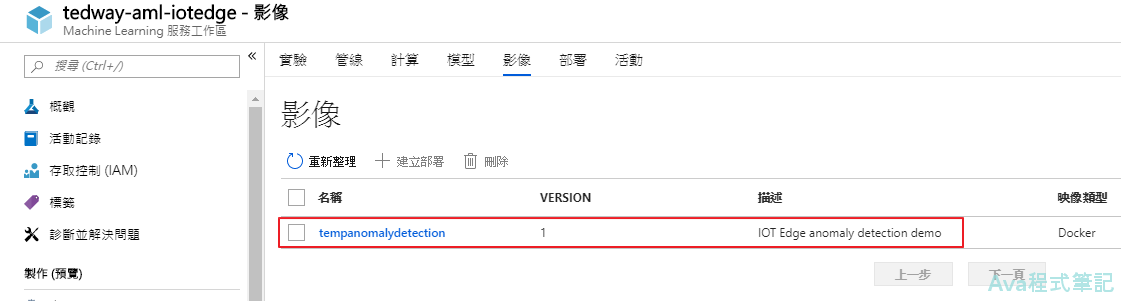
Create Docker Image用剛才在 ML 工作區的模型建立 Docker Image,工作區一樣會有新的 image 項目產生
Test model on Azure Container Instance將剛才產生的 image 發佈成為 web service 進行測試,測試完後 web service 可以選擇刪除或先保留
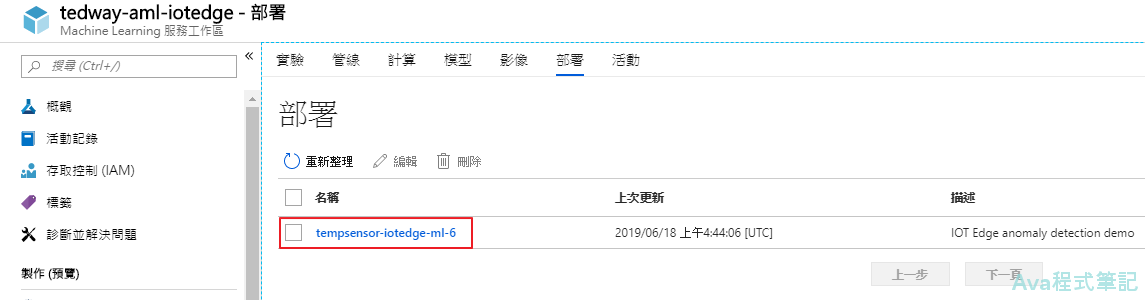
最後第五部分「Deploy container to Azure IoT Edge device」將 Docker Image 的設定檔傳送到到 IoT Hub,IoT Hub 就會將其佈署到 IoT edge device ,也就是一開始建立的VM上。這樣 Notebook 的部分就完成了!
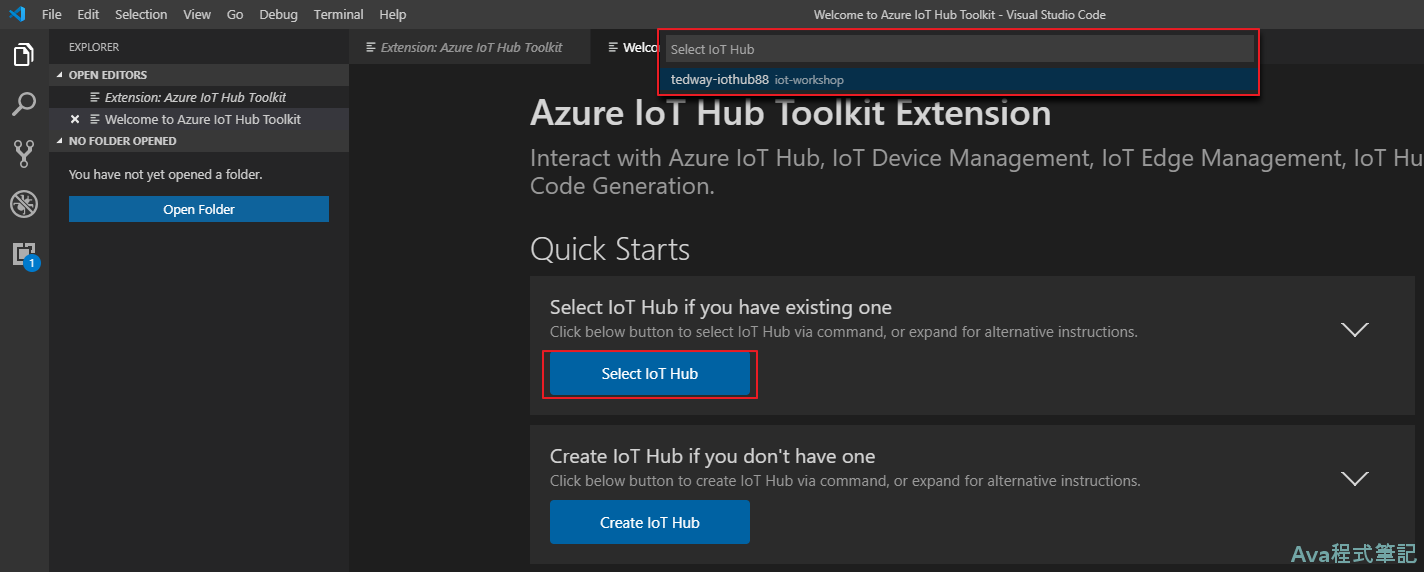
接下來在 Visual Studio Code 安裝 Azure IoT Hub Toolkit,連線到 IoT Hub ,查看 device 傳回Hub的訊息
- 連線到 IoT Hub:登入 Azure 後,在 VS code 上方選擇訂用帳戶和 Hub 名稱
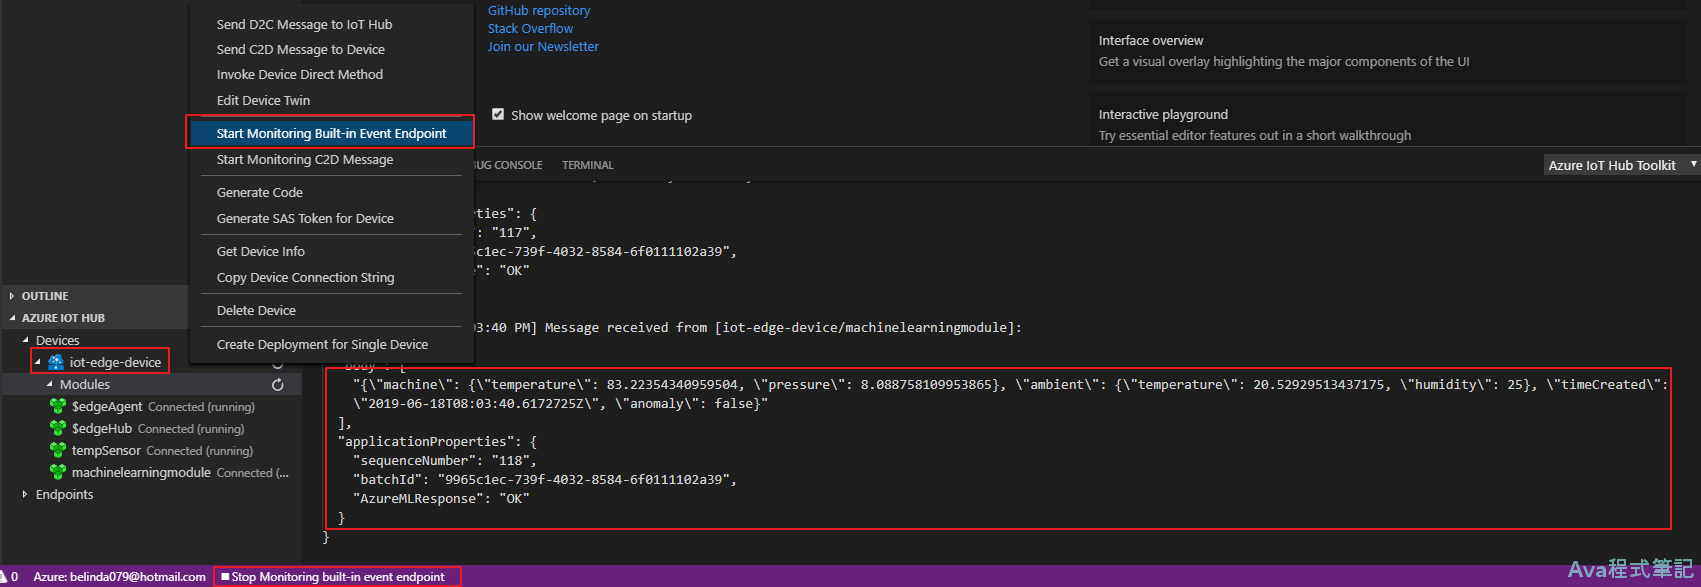
- 左下角 iot-edge-device 按右鍵,選擇「Start Monitoring Built-in Event Endpoint」,在 Output 區塊可以看到每5秒傳回來的溫度資料和ML模型判斷的結果(anomaly: false),最後按下面的「Stop Monitoring built-in event endpoint」結束偵測
到此,Tutorial 完成!
ps. 一開始在 VS code 並沒有看到傳東西回來,而且右邊 machinelearningmodule 不是綠色的 running 的狀態,後來是到 Azure 中將 IoT edge VM 重新啟動後才成功
ps2. 安裝 Terminal client 部分,雖然 tutorial 上有寫,但似乎沒有用到?
ps3. 之後記得到 Azure 將資源群組刪除,不然會一直收費喔
<如有轉載,請附上本文連結網址>